
Why Plants Get Yellow Leaves & How to Treat Them
431 views
A healthy plant doesn't usually turn yellow overnight. That's why those first pale leaves can be frustrating. One day your pothos looks lush. A few days later, the lower leaves are fading, softening, and eventually dropping onto the floor.
I've seen it happen after a weekend away, after switching fertilizers, and even after moving a plant just a few feet closer to a sunny window. Yellow leaves aren't a disease by themselves. They're a symptom. The trick is figuring out which problem your plant is trying to signal before making changes that accidentally make things worse.
Let's break down the real reasons plants develop yellow leaves—and what actually fixes them.
Yellow Leaves Mean Chlorophyll Is Disappearing
Green leaves contain chlorophyll, the pigment responsible for photosynthesis. When a plant experiences stress or naturally ages older foliage, chlorophyll begins breaking down faster than the plant can replace it. The yellow pigments that were already inside the leaf become visible.
Simple enough.
The difficult part is identifying why chlorophyll production slowed down.
Different causes often create surprisingly similar-looking yellow leaves.
Start With the Watering Habit
More indoor plants die from overwatering than underwatering. That's probably the most common mistake I see.
People notice a droopy plant, assume it's thirsty, and add even more water. Unfortunately, drooping also happens when roots are drowning.
Signs of overwatering
Yellow leaves that feel soft
Wet potting mix several days after watering
Mushy stems near the soil line
Musty or sour-smelling soil
Black or brown roots if inspected
Healthy roots need oxygen just as much as they need moisture. Waterlogged soil fills the tiny air pockets that roots depend on. Without oxygen, root cells begin dying, making it difficult for the plant to absorb nutrients—even though plenty of water surrounds them.
That's the frustrating irony.
Signs of underwatering
Yellow leaves caused by drought usually behave differently.
Leaves become dry, crispy around the edges, and sometimes curl before falling. The pot feels unusually light, and the soil often pulls away from the sides of the container.
One deep watering usually improves the plant within several hours or by the next day, although damaged leaves rarely turn green again.
Light Problems Hide in Plain Sight
Plants don't all want direct sunshine.
A snake plant tolerates lower light much better than a fiddle leaf fig. Meanwhile, succulents often stretch and weaken in dim rooms before yellowing begins.
I've watched people move a peace lily from a shaded office into a west-facing window, expecting faster growth. Instead, several leaves developed pale yellow patches within days because intense afternoon sunlight scorched the tissue.
Different symptoms point toward different lighting issues.
Light Issue | Common Symptoms |
|---|---|
Too little light | Older leaves yellow first, slow growth, smaller new leaves |
Too much direct sun | Yellow patches, bleached spots, crispy brown areas |
Sudden location change | Temporary yellowing as the plant adjusts |
Rotating indoor plants every few weeks also helps produce balanced growth, especially if light enters from only one direction.
Nutrient Deficiencies Can Look Surprisingly Specific
Not every yellow leaf means fertilizer is needed.
Still, nutrient deficiencies do happen, particularly in plants growing for years in the same potting mix.
Certain nutrients create recognizable patterns.
Nitrogen deficiency
Older leaves turn evenly pale yellow while newer growth stays greener. Growth slows noticeably.
Iron deficiency
This one fools beginners.
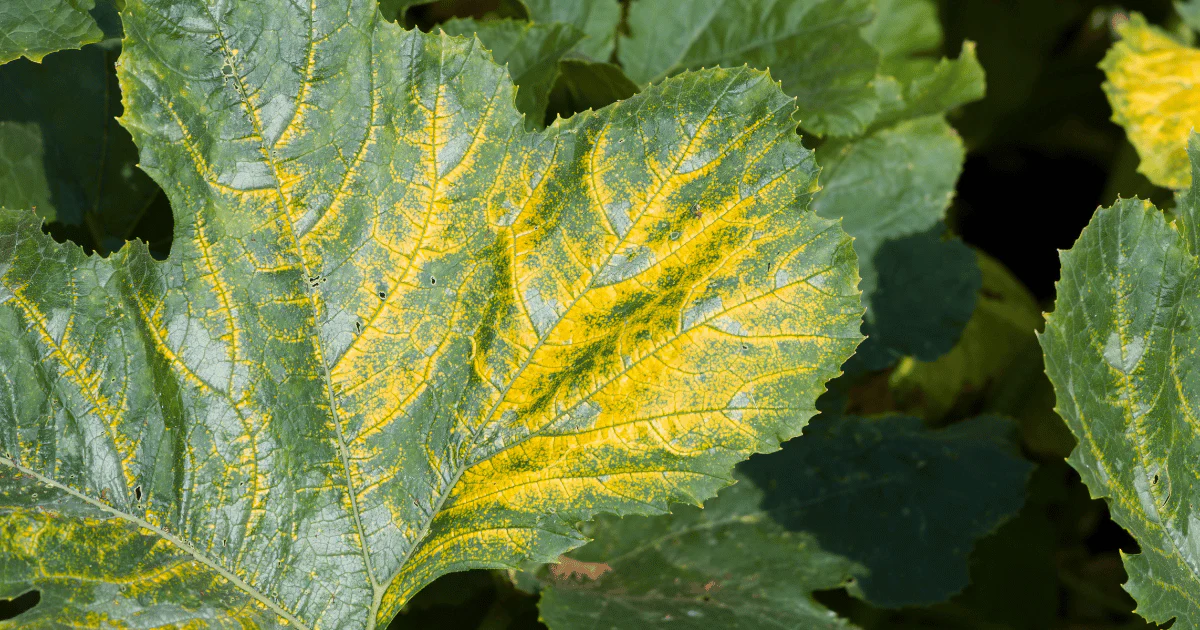
Young leaves become yellow while the veins remain green. Botanists call this interveinal chlorosis, and it's frequently linked to iron becoming unavailable because soil pH has drifted too high rather than the soil lacking iron altogether.
Magnesium deficiency
Older leaves develop yellow tissue between green veins, usually beginning near the leaf edges.
Laboratories and agricultural extension services commonly recommend soil testing before repeatedly adding fertilizer because excessive nutrients can damage roots almost as easily as deficiencies. University horticulture programs consistently emphasize testing over guessing.
Fertilizer Isn't Always the Answer
A common assumption goes like this:
Yellow leaf equals hungry plant.
Not quite.
Too much fertilizer causes salt accumulation inside potting soil. Those dissolved salts interfere with normal water uptake and may burn delicate root tips.
White crust around the pot rim? That's often mineral salt buildup.
If you've been fertilizing every week without flushing the soil occasionally, salts may be contributing to yellow foliage.
For most actively growing houseplants, balanced fertilizers with ratios close to 10-10-10, 20-20-20, or 3-1-2 work well when diluted according to manufacturer instructions. During winter dormancy, many indoor plants require little or no fertilizer at all.
Check the Roots Before Doing Anything Else
Sometimes the leaves aren't the real story.
The roots are.
Slip the plant gently from its container.
Healthy roots are usually:
White
Cream-colored
Firm
Fresh-smelling
Dark, slimy roots point toward root rot.
Tightly circling roots with almost no visible soil suggest the plant has become root-bound.
Both situations reduce the plant's ability to move water and nutrients upward.
Temperature Stress Happens Faster Than People Expect
Cold drafts matter.
So do heating vents.
Many popular tropical houseplants evolved where temperatures stay fairly stable year-round. Indoor temperatures below 10°C (50°F) can damage sensitive species like pothos, philodendrons, calatheas, and monsteras.
Rapid swings create stress even if average temperatures seem acceptable.
One winter, I watched a healthy rubber plant lose nearly a dozen leaves after spending several nights beside a frequently opened exterior door. Nothing else had changed.
Sometimes location is the only fix needed.
Pests Often Arrive Before Yellow Leaves
Tiny insects don't always announce themselves immediately.
Spider mites, aphids, thrips, scale insects, and mealybugs feed by removing plant sap. Eventually the leaves begin losing color.
Look closely.
Really closely.
Use a flashlight if needed.
Check underneath leaves where pests usually hide.
Spider mites often leave delicate webbing. Thrips create silvery streaks. Mealybugs resemble tiny pieces of white cotton tucked into leaf joints.
Early infestations are dramatically easier to eliminate than established colonies.
Could It Simply Be Aging?
Yes.
Plants naturally discard older leaves.
If only one or two of the oldest leaves near the bottom gradually yellow while fresh growth continues appearing from the top, there's usually no reason for concern.
Natural aging tends to be slow and predictable.
Stress-related yellowing spreads much faster.
A Practical Troubleshooting Order
Don't change five things at once.
That makes diagnosis almost impossible.
Instead:
Feel the soil moisture.
Inspect roots if watering seems correct.
Evaluate available light.
Check carefully for insects.
Review recent fertilizer applications.
Think about recent environmental changes like moving the plant, running air conditioning, or opening nearby windows.
Changing only one variable gives you a better chance of identifying the actual cause.
Treatment Depends on the Cause
Here's a quick comparison.
Problem | Best Solution |
|---|---|
Overwatering | Let soil dry appropriately, improve drainage, trim rotten roots |
Underwatering | Water deeply until excess drains away |
Low light | Move closer to bright indirect light |
Sun scorch | Relocate away from harsh afternoon sun |
Nutrient deficiency | Apply appropriate fertilizer after confirming deficiency |
Salt buildup | Flush soil thoroughly with clean water |
Root-bound plant | Repot into a container 2–5 cm (1–2 inches) wider |
Pest infestation | Isolate plant and treat with appropriate insecticidal soap or horticultural oil |
Preventing Yellow Leaves Is Easier Than Fixing Them
Consistency beats perfection.
Most thriving indoor plants follow a predictable rhythm rather than receiving perfect care every day.
A few habits make a noticeable difference:
Water based on soil moisture instead of the calendar.
Empty decorative cachepots after watering so roots never sit in standing water.
Use containers with drainage holes whenever possible.
Dust leaves occasionally so they photosynthesize efficiently.
Inspect new plants before placing them beside existing ones.
Repot every two to three years if roots have filled the container.
Rotate plants regularly for even growth.
None of those tasks take long.
Together, they prevent many of the problems that eventually show up as yellow leaves.
Frequently Asked Questions
Should I remove yellow leaves immediately?
Yes, once a leaf is mostly yellow, it won't recover its green color. Removing it allows the plant to direct energy toward healthy growth. Use clean, sharp scissors or pruning shears to avoid damaging nearby stems.
Can yellow leaves turn green again?
Usually not. Once chlorophyll has broken down across most of a leaf, the damage is permanent. Focus on correcting the underlying issue so new leaves emerge healthy.
How often should I water indoor plants?
There isn't a universal schedule. Temperature, humidity, pot size, soil type, and plant species all affect water use. Check soil moisture with your finger or a moisture meter instead of watering every few days automatically.
Is tap water causing my plant's yellow leaves?
Sometimes. Hard water with high mineral content or water containing chlorine, chloramine, or fluoride may contribute to leaf problems in sensitive species like spider plants, dracaenas, and calatheas. If you suspect water quality, try filtered or rainwater for several weeks and compare new growth.
Should I repot a yellowing plant right away?
Only if the roots need it. Repotting adds stress, so avoid doing it unless you find root rot, severe root crowding, or degraded potting mix. Otherwise, solve the underlying watering, lighting, or nutrient issue first.
Healthy leaves rarely appear by accident. Spend a few minutes observing the soil, roots, light, and overall growing conditions before reaching for fertilizer or the watering can. That careful inspection usually reveals the real problem—and once you've corrected it, the next flush of green growth often tells you the plant is back on track.
yellow leaves on plants
plant leaf yellowing
yellow plant leaves causes
how to treat yellow leaves
plant care tips
overwatering plants
nutrient deficiency plants
indoor plant problems
healthy plant growth
gardening tips
Found this helpful? Share it!